When developing iOS apps a number of things are required for producing a quality product. These include the ability to run unit tests on the code and to test the user interface automatically. We can set up Continuous Integration (CI) to complete these tests for us. If all tests are passed then we automatically upload to Hockeyapp for our testers to download. In this blogpost I'll take you through the process of setting up a CI pipeline for iOS.
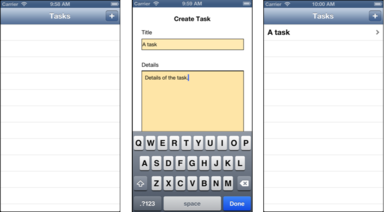
We built a very simple app called ‘Tasky’ which pretty much does as little as possible but enough to be able to build a complete workflow. We wanted an app with a bit of navigation and Core Data to give us enough to test.
Setting up language support
We use WebTranslateIt to handle our language strings. This web tool lets you create keys and then provide text in different languages. It provides a Ruby command line tool that allows you to download the complete Localizable.strings files.
Set up WebTranslateIt (http://webtranslateit.com) and the WebTranslateIt Synchronization Tool. Go to https://github.com/AtelierConvivialite/webtranslateit/ and follow the instructions.
Install OS X Mavericks, Server and Xcode 5
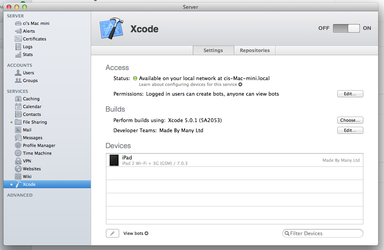
Get the latest version of OS X Mavericks, Server and Xcode 5 from the Mac App Store and install. Run up the Server app and switch on Xcode. You then add the team from your developer account and add any connected devices.
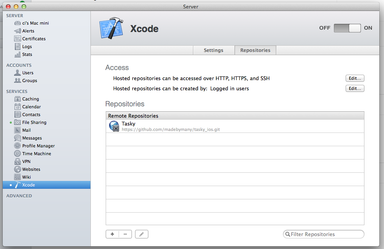
You can also add you repositories to Xcode. Here we are using Git.
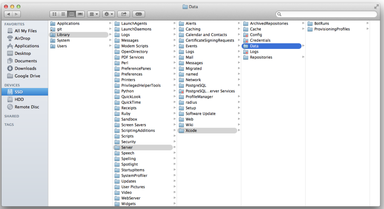
Provisioning can be a problem so it may be necessary to copy the correct provisioning file into: /Library/Server/Xcode/Data/ProvisioningProfiles. You will need to change permissions to have access to this folder. It is a good idea to be able to see into /Library/Server/Xcode/Data as this is where the BotRuns are stored. Also make sure your distribution certificate is in both the login and system keychains.
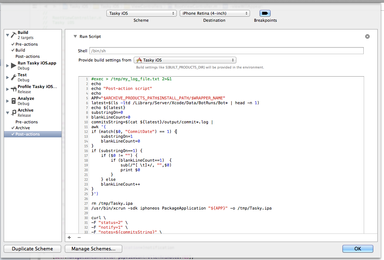
We added two scripts to the project scheme. One for build pre-action and one for archive post action. These are found on the project scheme tool.
Once 'Edit Scheme...' is selected, the action scripts can be created.
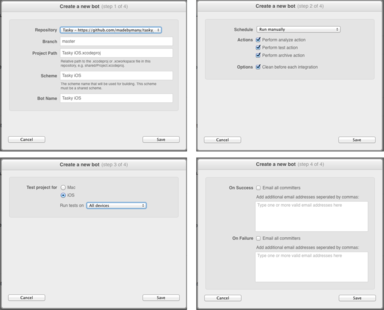
Once the source code repository is set up and a device has been attached (simulators will also work) then the project bot can be created. Click on the ‘View bots’ button on the Xcode view in Server and add a bot from the web view.
We do two things prior to the actual build. First we pull down the latest language files from WebTranslateIt and copy them to the right location in the project file structure.
Note: private_read-write_API_key is the key given to you language files by WebTranslateIt.
Then we create a unique build number by taking the date and time and creating a hexadecimal version so as to not make it too obvious. This is written back to project plist file.
Unit testing language strings are correct
We have unit tests for the app but of particular note is our unit test for the language strings. We use OCMock (http://ocmock.org) and OCHamcrest (http://qualitycoding.org/resources/) in our sample project. In the class below we step through the default language string file to extract the keys and then step through all the languages supported in the app to ensure that the keys exist. If they do not then this unit test will fail.
We need to find the latest bot run in order to extract the latest build. The ‘latest’ build alias doesn’t actually point to the latest build until AFTER the archive post action has completed. We also extract the commit messages for the specific build.
Despite this being the archive post-action, at this time the final build has not actually happened so we have to do an additional packaging of the app for the upload to Hockeyapp.
We now run instruments with a javascript file to test the UI. This doesn't work out of the box and requires a slight hack to make it work. This involves extracting any errors from the script result so if the UI fails then an error is output to the bot log and the whole build process is stopped. This will then show up as a failed integration. If the UI passes then we upload the app to Hockeyapp.
Note: 'device_UDID' is the UDID of your iOS device attached to the CI box. 'app_id' is the ID your app is given by Hockeyapp. 'company_id_token' is the ID your company is given by Hockeyapp.'
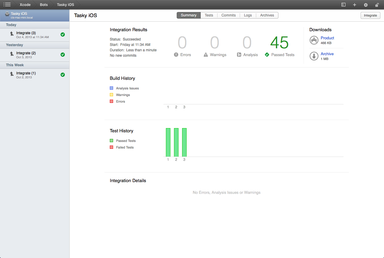
Click the 'View bots' button on the Xcode panel in Server which will open the bot in Safari. Click the 'Integrate' button and when the integration has completed, this is hopefully what you’ll get.
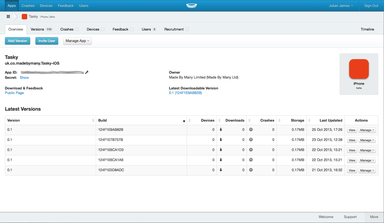
When all test have passed successfully the app will appear on Hockeyapp as shown below. Note the unique build numbers.
We’ve used a variety of tools to bring together a complete Continuous Integration stack. With this we are able to commit updates, automatically build, unit test, run a UIAutomation script and upload to Hockeyapp.
